Saturday, December 30, 2006

Crazy for You

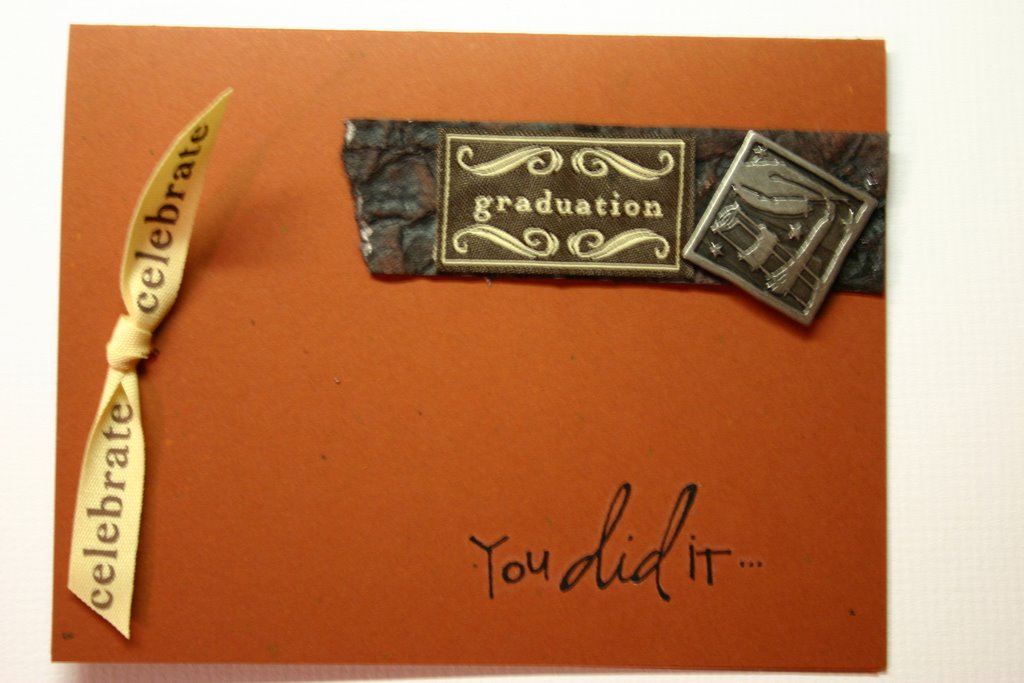
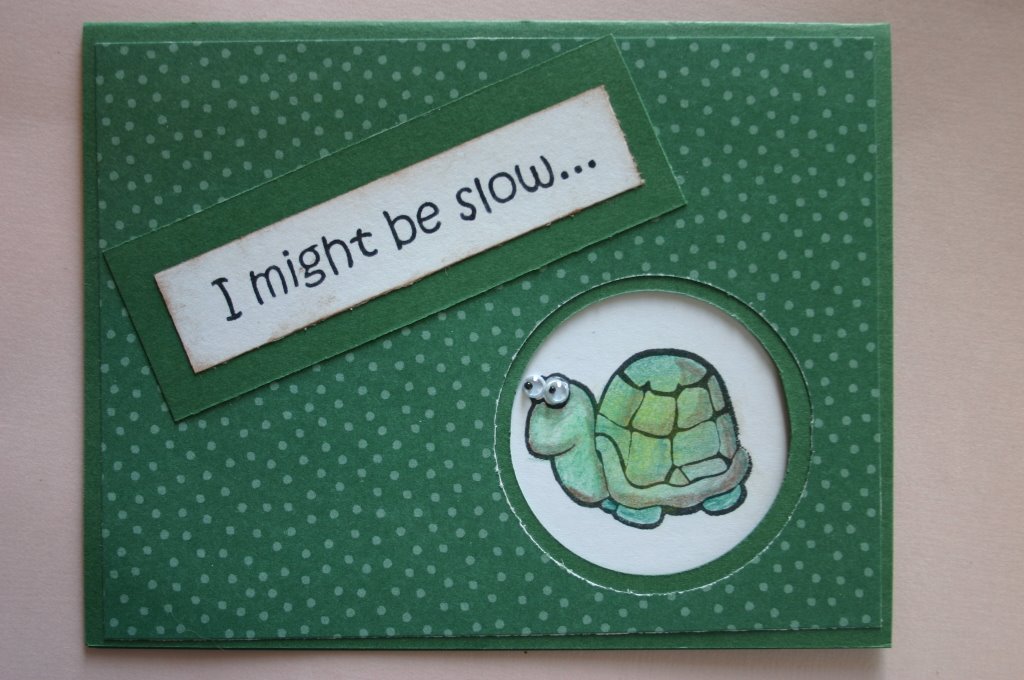
I love locks and keys and the hinges on doors. I grew up in houses that didn't have the locks and keys we use today. We had skeleton keys for every door and most keys worked in every door-so why bother to lock anything??

So for this card I wanted to make door hinges-at least that is what I started to conceive. I think these look like hinges-but they aren't the ones in my head. I used my score-it board to fold over the flap on the side. If you look really close, the top hinge has a score-it mistake I ended up covering with paper that looks painted like a door. I only had a small piece of this card stock and had to preserve or change my colors.

I rarely make square cards-they are costly for postage. But this one would not have looked as good had it been a long card and most definitely would not have worked as an A2. The hinges wrap around to the inside-luckily I didn't think it needed to be covered inside-it was very neat and tidy. The rub on was from a sheet left over from some other project. I would have used a stamp but was just too lazy to walk up the stairs. I made this Christmas Eve. Still not in winter mode.

You Make Me Dotty!

I still am on a Valentine kick! Pink and black were just born to go together but something caught my eye in the scrap bin-spring time green. The hardest part of making this card was getting the ribbon and ric rac to lay flat and let me get a knot in them. I said many bad words.

The base of this card is Bazzill washboard black and two misc. scraps layered on. I punched a medium circle and popped it. The heart-a bit primitive-was free hand cut. Tied a few more scraps and it was done.

Just a few swipes of a Colorbox chalk ink in Alabaster white for a distressed look made a big difference-it went from okay to pretty neato-at least according to a 10 year old. She said-You really like to do that, don't you? Yupperoo.

Monday, December 25, 2006

Overlaid Message Trees

I recently took a Hero Arts class. This was the first time I tried stamping on acetate (transparencies or overheads). I think the directions for this card were backwards. We were instructed to stamp on card stock for the trees in two different colors and then line them up across the card on top of the red card stock.

The acetate overlay was then placed over the top and then we stamped words on the acetate to line up with the tree shapes. It made much more sense to me to stamp the words on the acetate overlay where I wanted the trees and then position the green trees under the overlay-to line up perfectly. As you can see, I did it according to the written instructions with the kit-and it didn't turn out great. But, hey! I tied that bow pretty good for a change. It was easier to work with than grosgrain ribbon. Maybe the clue is the finer the ribbon the easier to tie!

I am going to make more of this type of card because its so neato-but I will try my way instead and see if its easier and neater too. Either way-hubby says he has a whole box of laser printer transparencies I can have as they never use them at work anymore! Can you spell FREEBIE???

Missing and Confused

I should be making Christmas cards-but I am not in the mood. I don't know why as I have all the bits and pieces laying out on the table. Maybe it's the lack of snow-maybe it's the lack of sunshine. So I decided to make valentines. At least that is what this started out to be but ended up a more everyday card. I have the damnedest time tying small bows. My hands go one way the ribbon usually ends up in the cat's lair. What is the secret to bows?
I love using rub ons when I am in a hurry or rut. This might have said I love you or you are the one-but I decided to make it a card for anytime. Maybe at Valentines Day, I will make Halloween as it seems I am so out of sync right now. All of the papers came out of my scrap box-I have avowed to use up the scraps as much as possible because its getting way too full. So is anybody missing me tonight? Nope.

Friday, December 22, 2006

The Frosty Trio.....To Warm Your Heart

I totally CASED this idea. I just love the simplicity of it and it was so much fun to make. Under this paper and card stock (the sides are plain blue-and there is duplicate set of snowmen on the back) is a simple Styrofoam block. I glued the paper all around and then carved out a hole for the tea light candle on the top. I then cut out a square the same size as the sides, making sure to match up the stripes. I punched out a circle for the paper to fit over the candle and then punched another circle to fit over that but used the square piece and made the outside about a 1/4 inch all around to form a ring. Glittered that up really nice and tapped it down. Cut off two stripes from the leftover red card stock for a border.

The snowmen are so easy-just one inch circles, which I drew goofy faces on. Hand cut some carrots for noses and then glittered the faces for reflections of snow. The other side snowmen have rosy cheeks, so you can decide if your snowmen are just getting warmed up or are truly frozen! The blue half circles which the snowy guys are poised over - is just that-one large circle cut in half!

Now remember-you CANNOT light this! You will make a bad mess, a bad smell and its very dangerous. Its just a cute thing for your desk, dinner table or a place setting. Enjoy!!

Santa Does NOT Have Conjunctivitis!!!!!!!

I was supposed to be making Christmas cards this week-but for some reason, I started making Valentines. I knew I had to make at least one card using a SU set to stay in my Yahoo group. So I went digging in the bin in the bedroom-and found glitter rub ons. And a remnant of black Bazzil washboard card stock. Dug some more and found this Santa and the words stamps from Stampin' Up. Still I wasn't sure how the black card stock was going to look, until I laid it out. Interesting, I hummed to myself. Certainly not traditional. So I assembled and stood back-and I liked it! I really really liked it!

I showed it to hubby who barely looked. So if it doesn't have blood and war and bombs, he just isn't interested. Oh, it didn't look like a football either. I knew there was one person who would tell me the truth. My niece Kayla who will be 10 next week will either love it, hate it or give me another idea. I met her for supper at Bob Evans (20 minutes to get water-two hours to get and eat a salad?). And we went over my whole new stash of cards I had been working on. I let her keep the one I was unhappy with because she liked it. She said she was inspired to go home and create herself. And this card got the thumbs up!

Now, just to clarify-Santa is not suffering from some awful eye infection-its just the reflection off the Stickles. SO he isn't contagious and is safe to visit the kiddies this weekend!

Have a wonderful holiday season with all your loved ones. I am hoping to find a tofurkey to roast with my rutabaga and watch basketball all day and maybe go for a run if the weather isn't icy.

Thursday, December 07, 2006

Velvet Valentine

I always mess with stuff. There are times I take stamp camps and other pre-set ideas and make them my own. I don't like being like the rest of the class. I have no idea what this was supposed to look like. I was "late" for class and everyone else was done. So the instructor just gave me the pieces to take home and put together later. I know for a fact there was no grape distress ink in the class and that was the first thing I did with my edges. And I also added acrylic enhancement to my stamped heart on the tag. I love this velvet like paper and have it in many colors and even some that is already embossed. Its maybe 1.99 a sheet but you get so many uses from it! This card is so old fashioned and feminine. I bet my gramma would have loved it.

Tuesday, November 14, 2006

The Voice of the Turtle

Do you like goofy? This card was a make-and-take at Karen's in Burton/Davison and the eyeballs make me laugh silly! Inside this card is a phrase to match the outside but it looks better this way as far as a photo goes. The turtle was done in watercolor pencil and I tried to mimic the shading of a real turtle shell. These cards with peekaboo cut outs are so fun to do. You can add 3 D items such as flowers, shells, or eyeballs. Next time I will try this same idea but use a small shaker box set up. I think of Ernie Harwell and his inspiring poetry about the "Voice of the Turtle" on Opening Day of each baseball season. I may be slow but I get where I am going eventually!

Water Color Love

I am so in love with watercolors! Pens, pats of paint, crayon-like sticks and of course, the pencils. My new favorite is pencils with no wood on the outside. I got a box of 24 at Micheal's with my half off coupon a few weeks ago and they are so much fun.


On this particular card I used Tombo markers as I wanted a wet stamping. I was able to get some shading but it doesn't show much in this scan. I did get my bow to lie a little flatter here-just tied the piece in a knot and stuck it on with a glue dot. This may work better with thinner ribbon like this organza type. Five minutes tops with this card too. Changing the colors would give it a different feel depending on the season-or just change the type of flower. Good all around quickie in a pinch.

Sunflower Fair Morning

This was a Make and Take at Stacey's October Open House in Fowlerville. It was fun using the Scor-It Board for something other than scoring cards in half. We did the lines along the bottom and top. The flower was done with multiple ink pads by tapping lightly on the stamp for shading effects. This again is one of those 5 minute cards-the only thing that might take longer is for the glue to dry on the fabric leaves. The leaves come in lots of colors-cream, dark green, black, silver and gold. I wish there had been red! Or orange! If I am not mistaken, the leaves fibers are from May Arts. I got several feet of each.


I think you could use any large flower format for this card and have it come out nice and vibrant. I am going to try it with a leaf collage and possibly with a Pine tree since I have so many pine stamps. I just want to get the variants in the colors on the flora.


Saturday, November 11, 2006

Oh Danny Boy..and Other Drunken Songs.

The song Oh Danny Boy always made my gramma cry. She loved how Jim Nabors sang it and also the renditions on the Lawrence Welk Show. It reminded her of home. It is a very sad song, I agree. But most of the singers I have ever heard were so drunk that it ended up funny. Often they would try to hit a high note and beer would snort out their noses. Most of the Irish and pseudo Irish I know are pitiful sots when drunk. Of course, every March 17, we all pretend we are Irish and do crazy stuff. That is what this particular card brings back memories of.

I personally did a 5K race every year-sometimes a longer distance if it gets dark and I get lost! Then it was off to the White Horse for green beer and holding up the wall-you didn't dare sit down because your back muscles went into spasms after running in the cold and wind. This card is stamped and painted with water color pencils. Don't you love the red noses? So true to life, I surely remember. I don't remember where the stamp came from-but it certainly is a "Limey" bunch of characters.

This card is for Jim Blackhurst-all that is missing is him on the table top!

Christmas Bling

This was a card I made a year ago. I had forgotten all about it until I was going thru a zippered bag of ephemera. The papers are from one of the Die Cuts with A View (DCWV) mat stacks from Joann's. I have purchased every mat stack they have done so far and there is always enough to share, so I always give some away. I also collect fibers-and cannot pass by a yarn shop or a sale at Hobby Lobby. Eventually, I will make a crazy quilt afghan with all the fibers I don't use in paper making or that I haven't traded away!


This card is standard A-2 size and took less than 5 minutes including drying of the Stickles! It would be so easy to make a stack of these, just altering the colors or the fibers to give it another look. The most fun about card making is to have no two alike. It's very easy when mat stacks, ribbons, and stickers are so afforable and easy to find.

Wednesday, November 01, 2006

John Deere


How many summers did I spend climbing on the haystacks and rolling in the lofts in the barn? I remember going to the chicken coop each morning and trying to gently steal the hen's production without getting my eyes pecked out! I hated being the one to go and would beg my sister to do it for me. She wasnt the coward I was.

My winter of 2ND grade was a turning point for me as far as animals and my relationship to them. I choked on a chicken bone and I felt it was a sign. I decided I could no longer eat them-which led to quite a strife in my home life. Being all meat eaters, my family thought I was a freak and still do to this day-I only ate tomato soup and cheese sammies for weeks until I no longer was eating anything. My parents took me to a shrink who messed with my head even more.

I found refuge sitting out in the field on the John Deere tractor about a mile from the farm house. No one looked for me and I could talk to the cows and field mice and felt I was one of them. I still to this day feel more at peace with furry creatures than I do with humans.

This card was composed of the tractor stamp from Stampin' Up Times and Seasons. All the papers are from my stash and the ribbon was something my cat had found and I traded for some catnip! The small flower brads are from Making Memories and the inks are Tim Holtz Distress inks which I applied with a water brush. I used a dimensional acrylic to highlight the fruits and veggies-my favorite food choices. Eat your veggies and meet me at the tractor under the willow tree.

Monday, October 30, 2006

Two Hearts


Another trip to the scrap box. The previous rub-on sheet has some other cool sayings, so I wanted to use them up before they were ruined. As it was, the one word I used here "love" part of it stuck to the paper funny and didn't take. The phrase on the vellum worked perfect tho and was a good complement to the xoxo stickers.

The paper is from a line called Eco-Africa which is run by native African women and is recycled from plants that are native to Africa. If you look close, you can see what looks like part of a banana skin embedded in the creamy paper. The metal heart is also from the same company. Isn't it great that something so simple as paper can inspire two cultures? The women who made this were able to better their lives from the money they made and I am able to create something very pretty.

Oh yeah, I also used my Cropidile for the eyelets. I will never go back to a hammer again if I can help it. Way cool tool-get one!

EEK!

Amazing what a small square of silly paper can become! This was part of a 12 x 12 piece of Rusty Pickle paper-I said it was one of my favorites. I cut out the silly/scary face and mounted it on a small square of black card stock with dimensional pop dots. I then roughed up the edges with sand paper and added a bit of grape distress ink around it. I also inked the edges of the card itself, then tore a small swatch of paper free hand and inked that too.

I glued the eek face on crooked and found a sheet of stickers (Rusty Pickle again) and added them a bit skewed. That odd bracket thing? I have no clue but it looks great where it is! All told, less than 5 minutes for this silly card. Courtney really liked it, so either I give her some of the paper or make her one like it! Eek! She may want both!

Dotty Love

I used to go to a stamp store locally every Friday that had Make and Takes for a buck! I tried to go every Friday either before or after the gym. There always seemed to be road construction or bad weather but I did usually make it at least half the Fridays in the month-and its a 20 mile trek one way to Davison. The store moved recently to Burton and the Make and Take policy changed so I don't go but once a month anymore. I miss going but the policy is now make and takes on Saturdays only and it's now 5.00 and you have to pre-register. I'd rather spend that much for a new stamp!

This card started out as one of those make and takes-just the dots -which was a "Dennis" created stamp for the store. The more I looked at it, the more I knew I had to add something, even as cute as it was. I found some rub ons that I has stashed away and there was a perfect phrase. But it needed some bit of more vibrant color. As it happened, last week I had bought a small jar of paper flowers from Bazzill in pinks, blues, yellows and greens. The blue one was perfect and as much as I usually hate acrylic stickers, this one was just right instead of a large brad for the middle of the flower. I think this would be great as a birthday card-or any time you want to say someone is special to you.

Tricks? Witch Would You Want?

Both of these cards are from the same set of Close To My Heart stamps as used in a prior post. Same papers, same inks, same watercolors. I just experimented a bit with composition and when put to a vote-there was no favorite. Each card got the same amount of cutes. I am totally flabbergasted-I had a woman last week ask me if I sold my cards! I am still stunned. I guess this means I should make more than one of each design but I haven't any idea of what to charge. Will have to mull it over a while.

Oh So Scary!! October Silliness!

I love Halloween! There are so many cute stamps, scary word stamps and some so strange I just don't get at all. Add in the wonderful papers, stickers and other embellishments and I would be crafting them all year! So I decided to make some cute cards that were scary because they are so cute! All the stamps I used for this card are from Close To My Heart. Of the ones I made in one evening, this was my favorite partly because of the torn piece of fabric I tied around the top.

I water colored the images with these fantastic new wood less color pencils from Eastern Europe (altho I got two yellows-very strange) and they were so cheap-only 14.00 for a set of 24 with a a two drawer case to tote them around. I blended with a CTMH blender pen-everyone would have one or 5 of these. The background paper is from Rusty Pickle and I bought one sheet of every Halloween paper they made so I will be making more fun stuff soon! Rusty Pickle is amazing with their designs. And the top of the whole thing is brushed lightly with Tim Holtz Distressing Inks-I have every color and each is more amazing than the one before.


So have a spooky fun time checking out my creations-and I get all the peanut butter kisses!

Fall on the Farm in Michigan

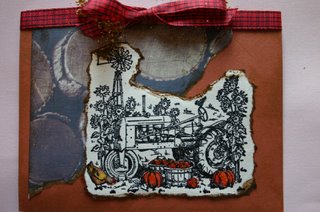
I designed this card with memories of my summers on my grandparents farm in Maple Grove Michigan. This stamp is from a set called Times and Seasons from Stampin' Up and I have wanted it for a long time, finally getting a winning bid on Ebay a few weeks ago. When I first started working on it, I thought it was too plain and almost put it aside because of the frustration I was feeling. Coupled with the fact my flash drive died today, and I was not in a good mood. Going thru a bag of scraps and odd items, I found a small piece of ribbon that seemed to bring out the orange of the pumpkins but still something was missing. I wanted some straw but who has straw brooms anymore? So rummaging in my silk flowers, I found some wheat (which prompty fell apart) and under it, was a small bunch of glittery baby's breath-so I tucked it into the bow and it seems to have given it the little extra I was looking for. I am not 100% happy with this card, but it does make me wish I was up in the barn chasing the wild cats many years ago. I have another card with the same stamp I will publish next month with an entirely different feel to it-but still another day on the farm for me.

Saturday, October 07, 2006

Beads of Success

This is an almost perfect 5 minute card! I love these bead thingies. I think you can stick them on any card, page or tag and for less than a few pennies, get a finished piece of wonder. This particular card, which I was about a year late mailing (I am so pathetic sometimes) would be elegant enough for a wedding, simple enough for a Sympathy, good for a mom's day celebration and terrific as a birthday card. All you would have to do is change the lower right corner to reflect what the observance is. Plus it only took about 5 minutes including the congrats stamped on the inside and the insertion of the gift card. WOO HOO!

I HATE Tying Bows and Knots!

I was so pissed off making this card! I had been given a small piece of handmade metallic paper that reminded me of leather. I knew it would look good on a guy's card. All the colors and pieces came together so well until I had to find a way to do that stupid piece of ribbon! I tried knotting it and using a glue dot. Wouldn't stick. I tried just laying it flat-looked flat. Finally I punched two itty bitty holes-which weren't even on the side-and then threading the ribbon thru it. The holes were too small for the ribbon. I was about to give up and I just said screw it and it laid pretty much flat. Some say there is a method to bows-upside down. I usually just make a mess and its a good thing this ribbon was on clearance!

Thursday, October 05, 2006

Weighing In On Baby Boys

Odd stamp-no name on it. Actually looks like Christmas foilage, doesn't it? I tried stamping it on a scrap of cardstock but the layering wasn't working for me. So I decided to stamp it under the vellum overlay-and it worked! I also edged the card itself with the matching blue ink.

Whenever I get metal embellishemnts, I take them out of the bags or off the cardstock holding them -just anal about the extra packaging I can usually recycle and it makes more room for items in the storage bins. This onesie metal piece was the first that caught my eye and I placed it under a word on the vellum that spelled out adorable but it needed to pop so I found an acrylic package of words in the dollar bin at Joann's-perfect color and just the right amount of eye catchiness.

I then stamped a greeting inside. Fast , quick and cute!

Woobie Woobie

Another month , another baby! I had received the white puffy embossed paper in a grab bag of papers and cardstocks at a stamp show in Novi, Michigan. It said "baby blanket" to me-or was it woobie? It was the centerpiece of how I was going to compose this card-again no stamping but I did paint the edges with acrylic paint to give it a softer look.

I am not a big fan of acrylic stickers-unless they are alphabets-but this baby was too cute to pass up. The package of pins I used in my previous post was still laying out so I took two colors to bring the baby's hair and the stars to the fore front. The fibers just added the perfect woobieness to finish it off.

Baby Boy Dreams


I made this card for friends who were adopting a bundle of baby boy from Guatamala. I had already given them a gift and remembered I hadn't given them a card. I knew I wanted to use the phrase "Dreams Do Come True" and I had this odd hat pin embellishment. I stamped the phrase on vellum and burned the edges to make it look aged-then tore off the word Dreams and substituted the hat pin. I now wish I had moved the pin in closer or even cut off the pick part.

Those baby safety pins were a quick add-on. I wonder if this generation even knows what diaper pins are!! I still use a cloth diaper to clean off my stamps. Its a strange color for sure! The card is cuter than it photgraphed tho-took me about 10 minutes-a quicky but helped I knew what I wanted to do upfront.

Bunny Love

This is the first card I made several years ago. Correction-this is the first card I had the courage to give anyone.

Oddly, I didn't stamp on this card. I just grabbed a few things and threw it together, so I could mail the baby gift and card together.

I wasn't really enthused with the way the edges of the cardstock distressed. I think it was because I tried to use the edge of my scissors to distress instead of a sanding block. I am really happy with the compositon and the colors tho-that die cut was the only one left in the discount bin and for boy or girl, would have worked out fine. The acrylic heart was just a last minute addition and I am glad I added it.